QuaverEd supports Schoology LTI Single Sign-On (SSO) access to our resources. We support various methods for automated rostering that can be paired with Schoology LTI SSO.
Otherwise, teachers can use student self-enrollment with Schoology LTI SSO to manually manage their rosters in Quaver.

Schoology LTI 1.3 SSO Setup
This section is directed toward IT administrators looking to set up Schoology LTI 1.3 SSO access to QuaverEd’s resources for their district.
How to set up QuaverEd as an LTI External Tool in Schoology
Step 1: District requests integration
Your district IT team should contact QuaverEd’s integration team at integration@quavered.com to get started!
Step 2: District sets up LTI 1.3 App in Schoology
In your Schoology Admin account, install and configure the QuaverEd LTI 1.3 app following the instructions below:
- Navigate to the App Center, and select the app named “QuaverEd LTI 1.3.”
- On the app description page, click Install LTI 1.3 App and then click I Agree in the pop-up window.

- Select Add to Organization.
- You will be directed to the Organization Apps page. Click the Configure button next to the QuaverEd LTI 1.3 app.

- In the Custom Parameters box, enter: source_section_id=$CourseSection.sourceSectionId
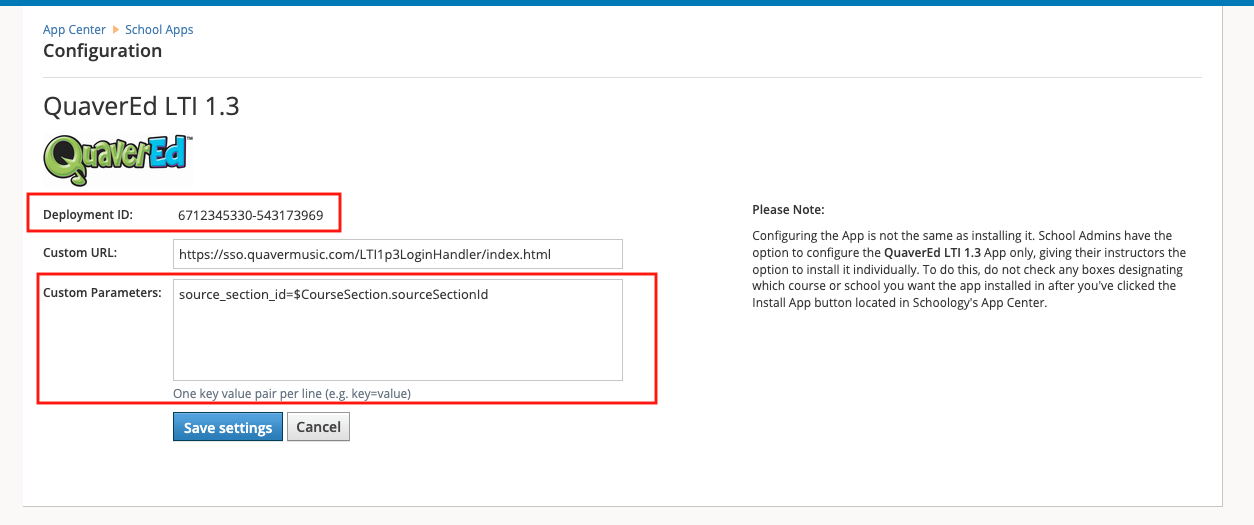
- Click Save settings.
- Note your Deployment ID – it will be necessary to complete the LTI 1.3 Integration in QuaverEd.
Step 3: District shares configuration information
Share your Deployment ID with QuaverEd’s Integrations team so we can complete the setup on our end.
Step 4: Testing
Once we receive your configuration information, we’ll complete the setup on our end. Then, we will move forward with testing the integration.
Your district will need to test the integration by having a QuaverEd teacher log in using the SSO link. If the teacher can log in successfully, we will consider the integration ready for district-wide release.
Please note that your SSO integration will be set up in a local testing state, so only a limited number of users can come through. Once we confirm everything seems to be working as expected, we’ll go ahead and release it for everyone to use.
Step 5: Release
When we have confirmed everything is working as expected, we will release your integration on our end. Teachers and students can begin accessing QuaverEd via Schoology.
Schoology LTI 1.1 SSO Setup
This section is directed toward IT administrators looking to set up Schoology LTI 1.1 Single Sign-On (SSO) access to QuaverEd’s resources for their district.
QuaverEd can be set up as an External Tool in Schoology to allow Single Sign-On access to QuaverEd resources directly from Schoology via LTI 1.1 using the instructions below.
Step 1: District requests integration
Your district IT team should contact QuaverEd’s integration team at integration@quavered.com to get started!
Step 2: QuaverEd configures our system to support your district’s Schoology SSO integration
We’ll need to set things up on our side first. We’ll generate unique keys and secrets for your district, configure your LTI parameters, and more. Once we have everything ready, we’ll provide you with the key, secret, and launch link you need to set up QuaverEd as an LTI External Tool in Schoology.
Step 3: Set up LTI External Tool in Schoology
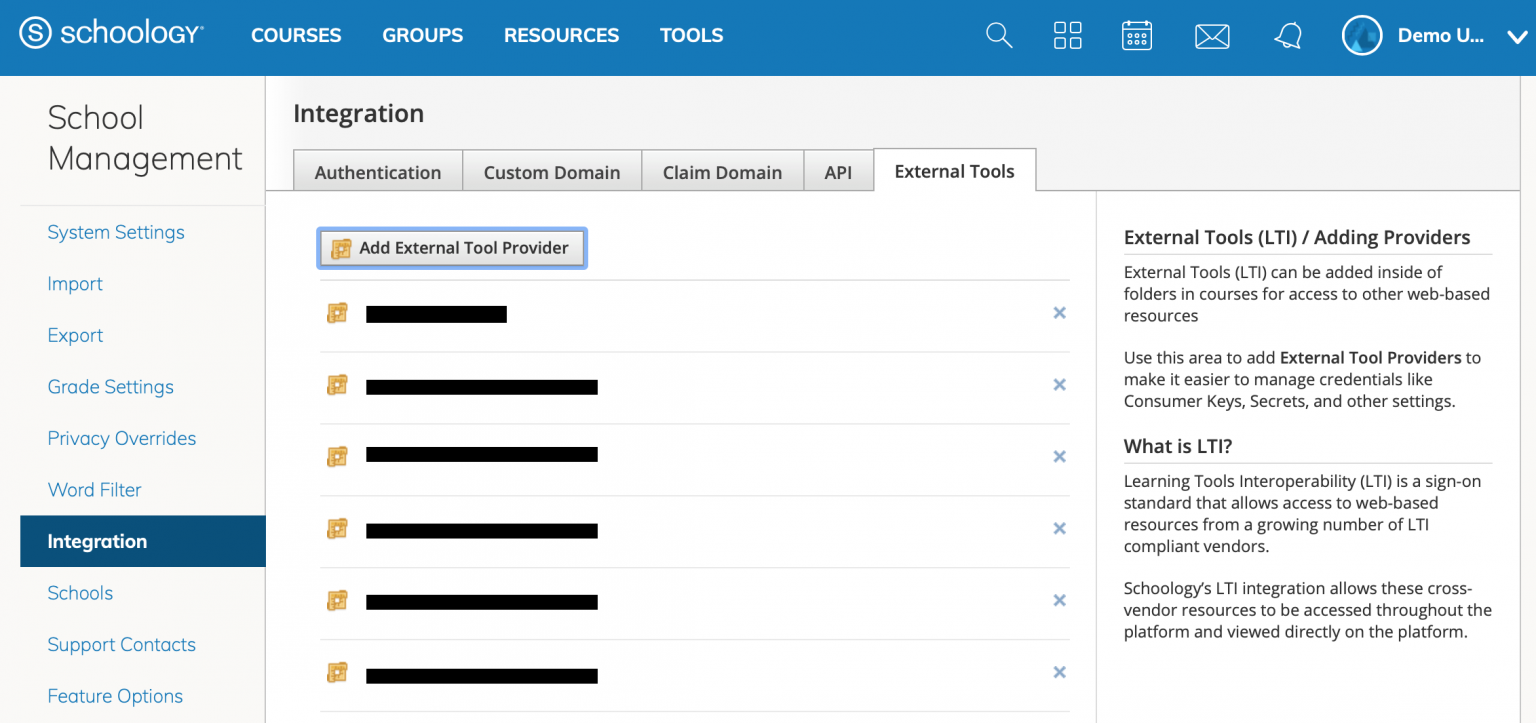
- In your Schoology Admin account, add an External Tool Provider.
You should be able to find this area via Tools > School Management > Integration > External Tools > Add External Tool Provider.
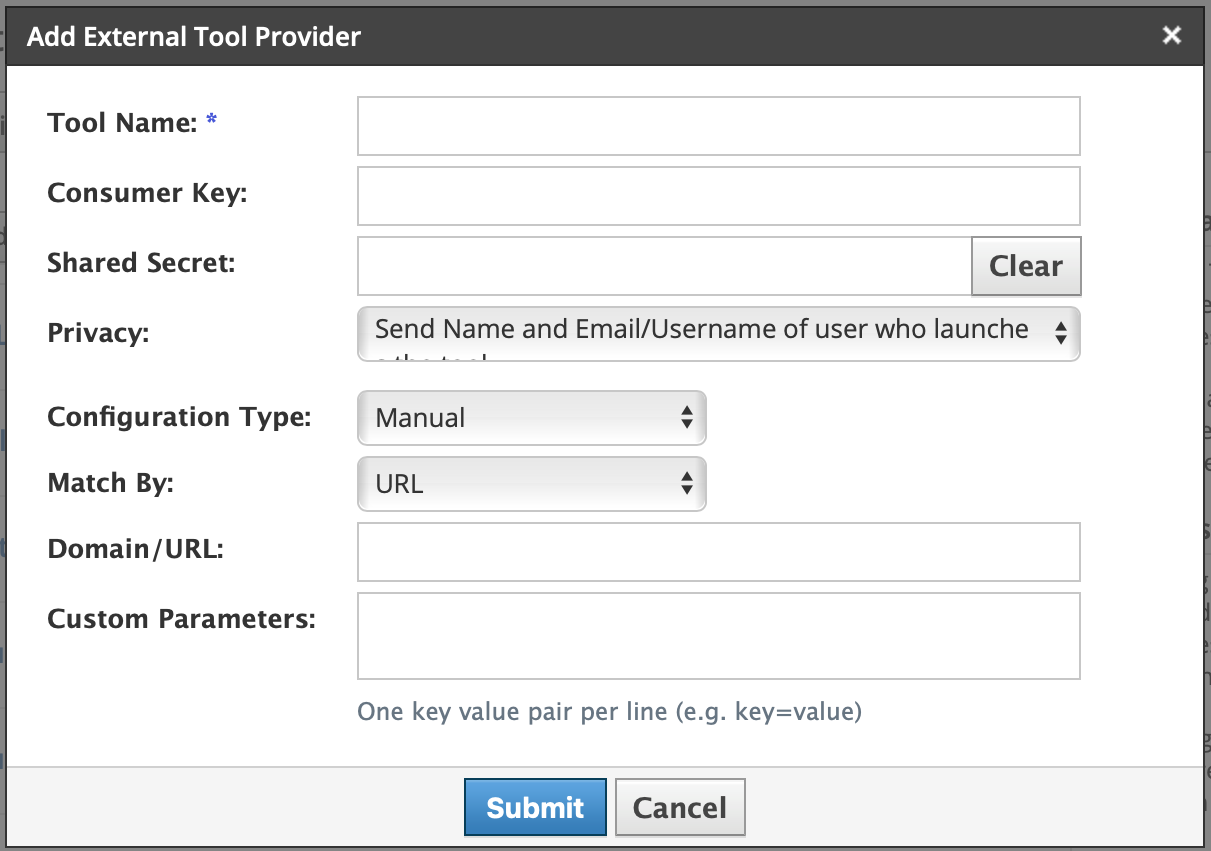
- On the Add External Tool Provider configuration panel, use the following settings:
- Tool Name: QuaverEd (or QuaverMusic/QuaverHealthPE/etc. as preferred)
- Privacy: Send Name and Email/Username of user who launches the tool
- Configuration Type: Manual
- Match By: URL
- Consumer key, Shared secret, and Domain/URL will be provided by our integrations team. They may be specific to your integration and should not be copied from another source.
- Custom Parameters may be left blank unless otherwise specified by our integrations team.
Note that QuaverEd will default use the Schoology user’s email address as the unique identifier and key value to roster data. If your users do not all have unique email addresses in Schoology, please notify the QuaverEd integrations team during the setup process.
Step 4: Testing
Once you have QuaverEd set up as an External Tool in your district’s Schoology instance, we’ll proceed to test.
Your district will need to test the integration by having a QuaverEd teacher log in using the SSO link. If the teacher can log in successfully, we will consider the integration ready for district-wide release.
Please note that your SSO integration will be set up in a local testing state, so only a limited number of users can come through. Once we confirm everything seems to be working as expected, we’ll go ahead and release it for everyone to use.
Step 5: Release
When we have confirmed everything is working as expected, we will release your integration on our end. Teachers can then add the QuaverEd External Tool to any Schoology course to support SSO from Schoology.
Adding QuaverEd to a Course
This section is directed toward teachers and students in districts with Schoology SSO integrations with QuaverEd. Please note that your district IT administrator must set up a Schoology SSO integration with QuaverEd, following the instructions above.
1. Sign in to your district Schoology account. This is often linked from your district’s website.
2. Navigate to the course where you would like to access QuaverEd.
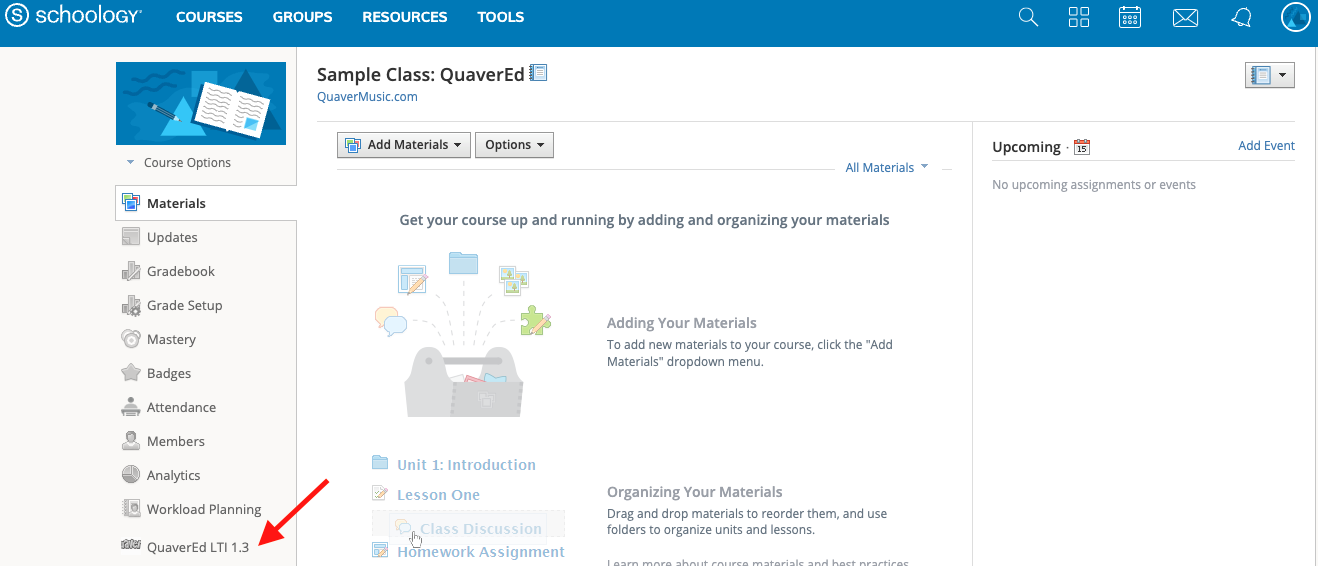
3. Check your sidebar! If your district has a Schoology LTI 1.3 SSO integration, the QuaverEd link will be located here.
4. If there isn’t a QuaverEd link in your sidebar, select the Add Materials drop-down menu and select Add File/Link/External Tool.
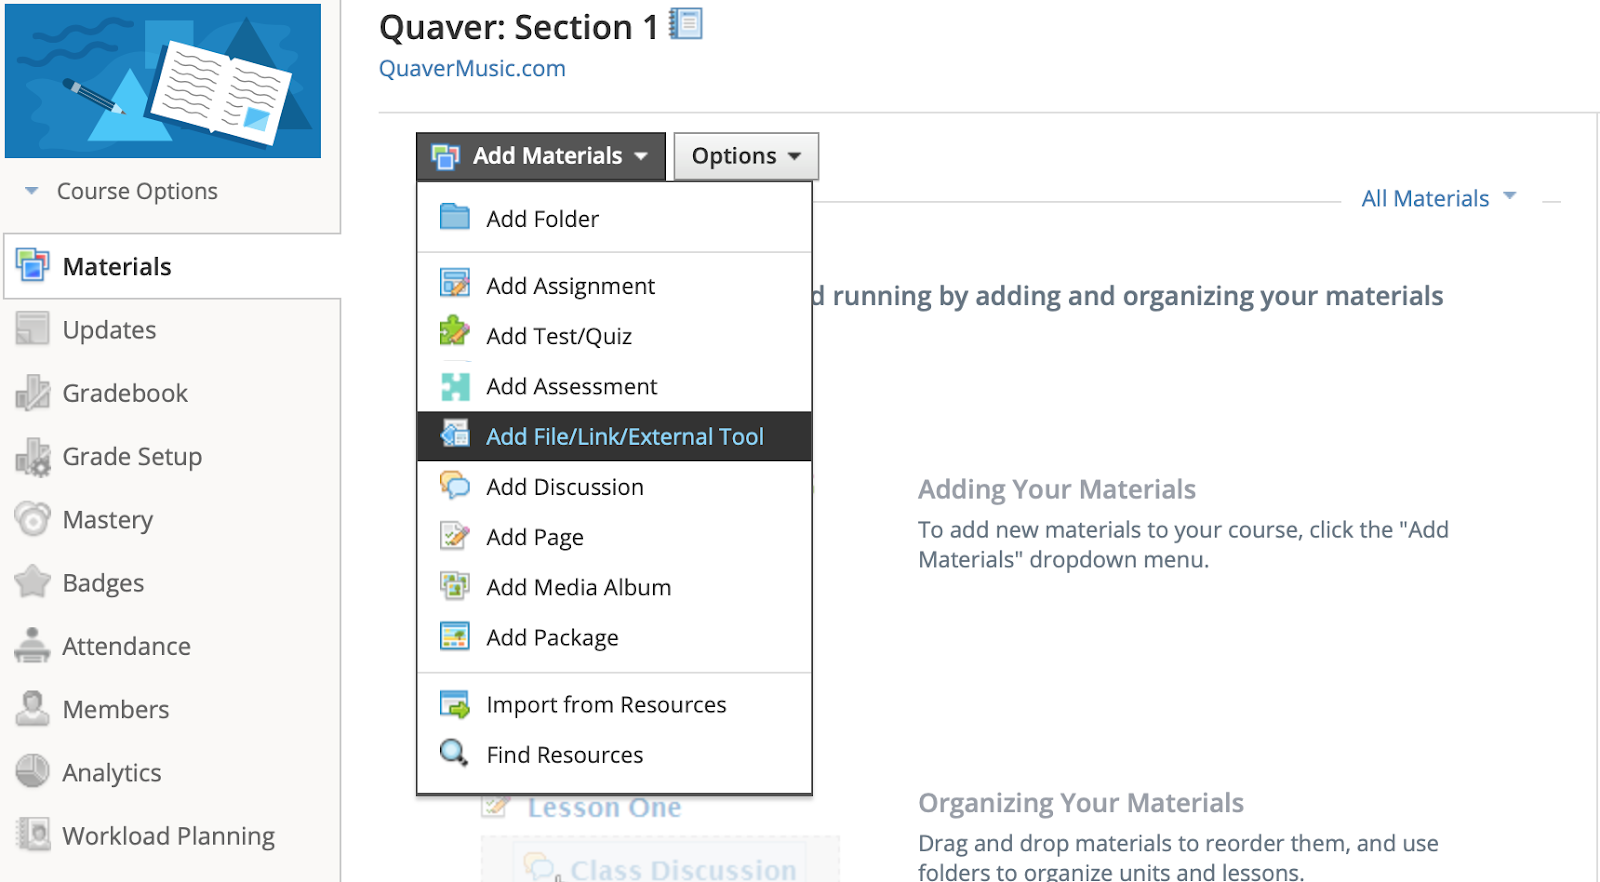
5. In the pop-up box, select External Tool.

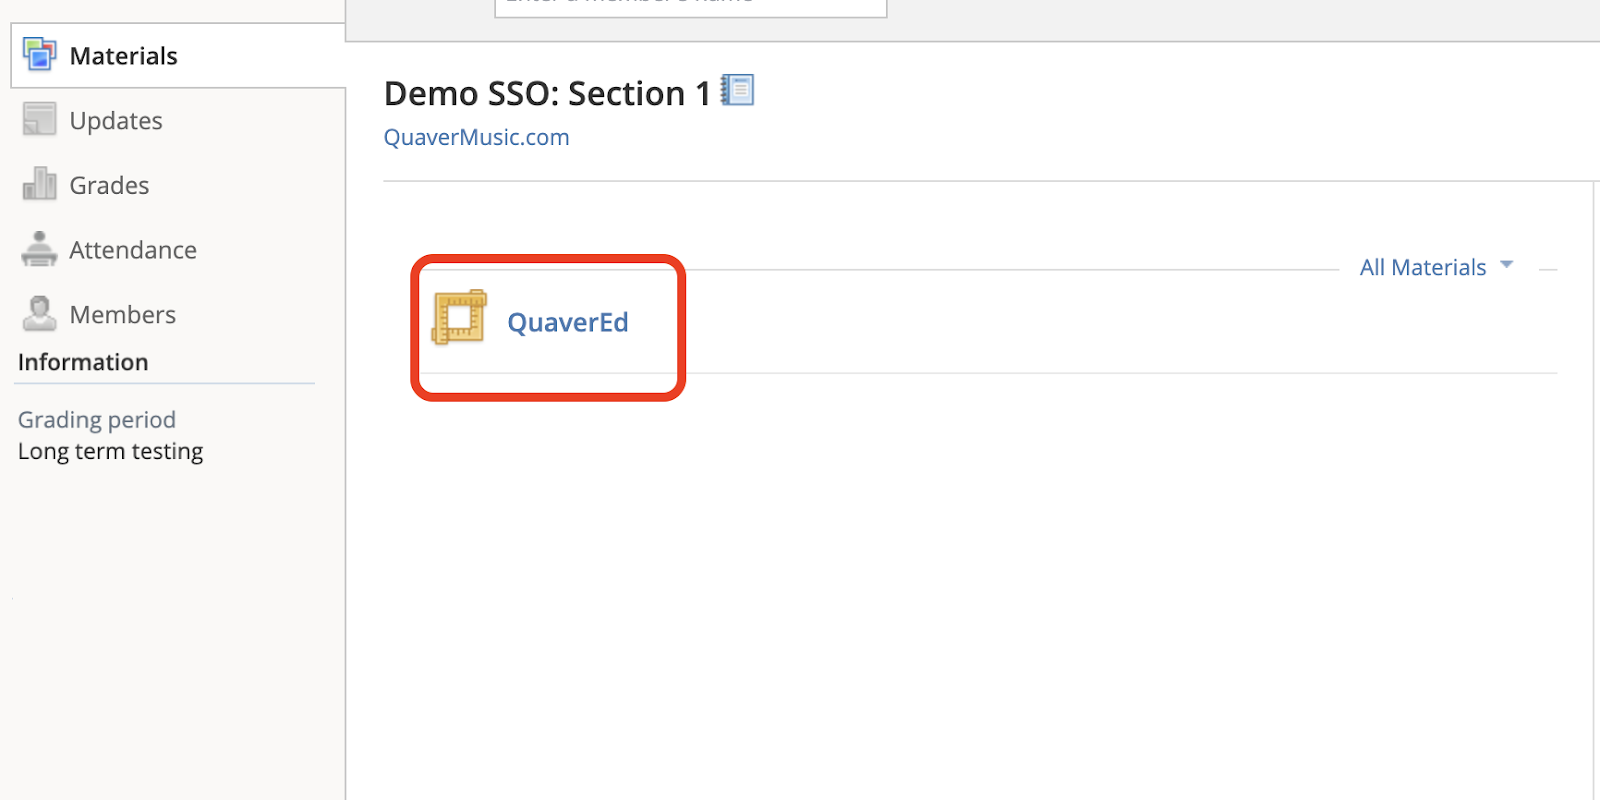
6. Select QuaverEd’s app from the list. Then, click Submit. The QuaverEd app will be accessible to students in your course.
Note: If the QuaverEd app isn’t listed, your district IT will need to add the app for teacher use.
How to Access QuaverEd from Schoology
- Sign into your district Schoology account. This is often linked from your district’s website.
- Find and launch QuaverEd’s app. This link will either be in your sidebar or in your course materials:
If the app is not available, it may need to be added to the course by a teacher.
- This page is essential! If this is your first time logging into QuaverEd from Schoology, you’ll likely see our Single Sign-On account provisioning page.
If we find an existing QuaverEd account associated with your email address, you will see the message seen to the right.
Select Yes, that’s my account to link to that QuaverEd account. Select No, that’s not me if you’d like to connect a different QuaverEd account.

- If you have created a QuaverEd account before, select Link existing QuaverEd Account. This will allow you to link your Schoology account to your existing QuaverEd account.
If you do not have a QuaverEd account, select Create new QuaverEd Account.

- Enter your QuaverEd Username and password and select LOGIN to link your Schoology account to your existing QuaverEd account.
If you have never created a QuaverEd account, select Go Back and select Create new QuaverEd Account in step 3.

- Depending on the type of account you’re using, you will land at one of the following places…


How To Sync GradeBooks with Schoology Using LTI 1.3
This section is directed toward teachers and students in districts with Schoology SSO integrations with QuaverEd. Please note that your district IT administrator must set up a Schoology SSO integration with QuaverEd, following the instructions above.
- In your Schoology environment, navigate into the class that you would like to sync gradebooks with.
*Note: The class you wish to sync gradebooks with must also be an active rostered class present in your QuaverEd GradeBook (provided by your district’s nightly roster sync).
- While in the class, launch the QuaverEd LTI 1.3 tool. This opens a pathway that lets QuaverEd automatically sync grades back into the LMS for that class.

- Once this is done, grades will sync nightly from the QuaverEd class into the LMS. You can also trigger a manual sync of the GradeBook at any time by launching the LTI 1.3 tool from inside the LMS class again.
